Gunpla: Cleaning up nub marks


- September 2022
- July 2022
- June 2022
- April 2022
- October 2021
- August 2021
- July 2021
- June 2021
- May 2021
- April 2021
- March 2021
- February 2021
- January 2021
- December 2020
- November 2020
- October 2020
- September 2020
- July 2020
- June 2020
- May 2020
- March 2020
- February 2020
- January 2020
- December 2019
- November 2019
- October 2019
- September 2019
- August 2019
- July 2019
- June 2019
- May 2019
- April 2019
- March 2019
- February 2019
- January 2019
- December 2018
- November 2018
- October 2018
- September 2018
- August 2018
- July 2018
- June 2018
- May 2018
- April 2018
- March 2018
- February 2018
- January 2018
- December 2017
- October 2017
- September 2017
- August 2017
- July 2017
- June 2017
- May 2017
- April 2017
- March 2017
- February 2017
- January 2017
- December 2016
- November 2016
- October 2016
- September 2016
- August 2016
- July 2016
- June 2016
- May 2016
- April 2016
- November 2015
- October 2015
- September 2015
- August 2015
- July 2015
- June 2015
- May 2015
Your Gundam model kits are meant to be cool, imposing and the main highlights of your displays when you've fully assembled them. Though that can be offset by some unsightly nub marks which may stick out around the vital areas of your kit....
There's nothing in the hobby of Gunpla that can't be fixed. We'll show you a quick and easy way to clean and patch things up!
Comparison:
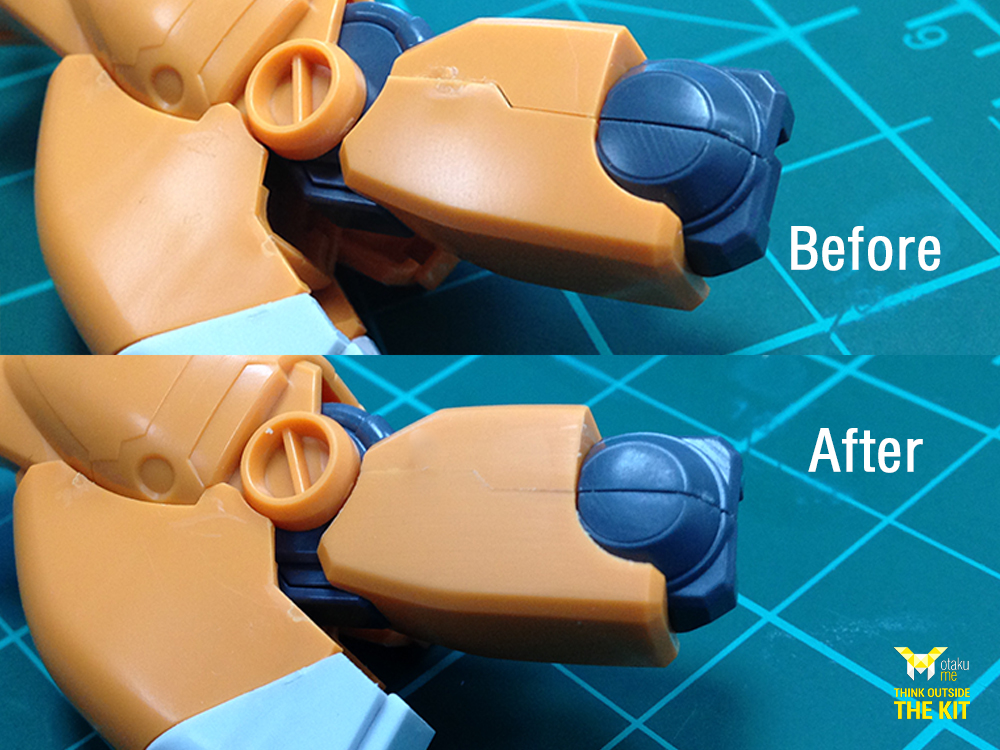
We'll be taking a look at the new "1/144 HGBD GM III Beam Master" from the new Gundam Build Divers series here as our example.
Step 1: Inspections
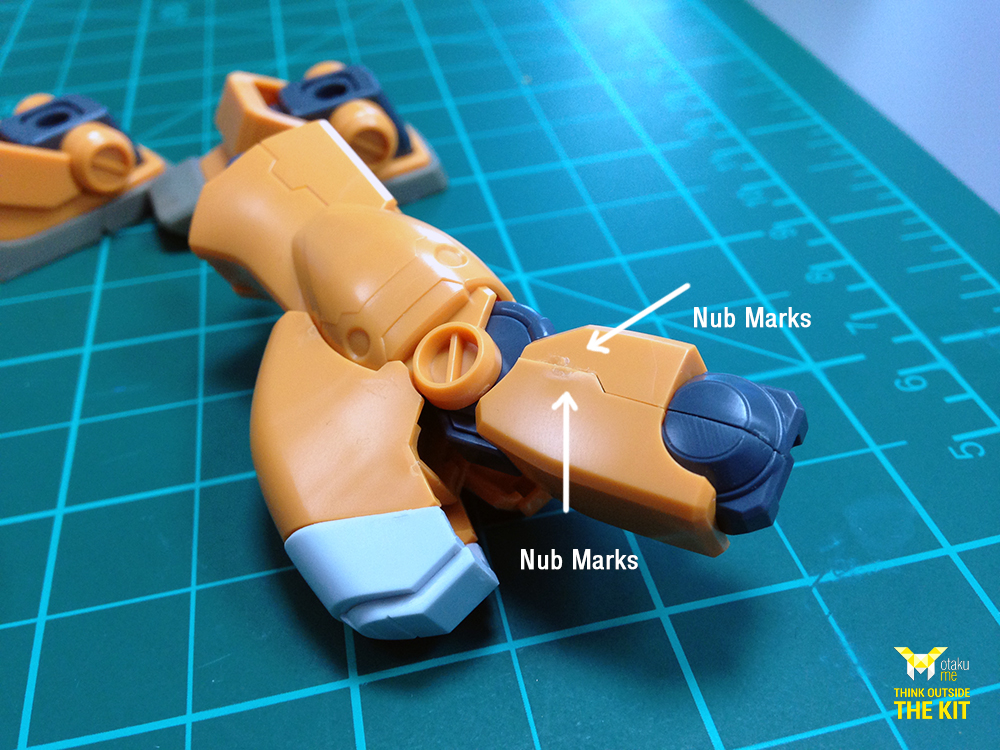
Inspect the area and gauge the damage. In this case, it's just a couple of white stress marks and a light gouge on the plastic, usually caused by cutting too close on the plastic parts instead of leaving a sizable gate.
Easy enough to fix up!
You can check out our video on your basics to building here.
Step 2: Choosing out your tools/supplies
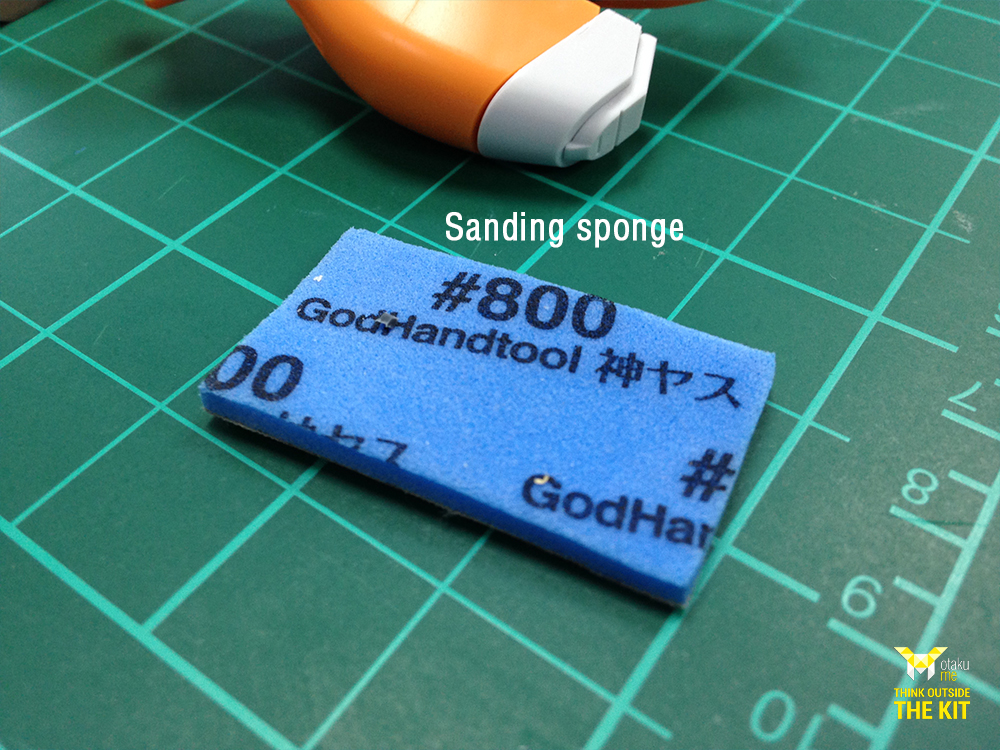
We're going with a simple sanding sponge in this situation as we don't need to do too much to fix some pretty light nub marks.
We chose an 800 grit sanding sponge for a couple of reasons... Its soft enough to conform to curved surfaces and provides the necessary abrasive to gently scratch away the slight surface of the plastic.
The idea is to get the surface even.
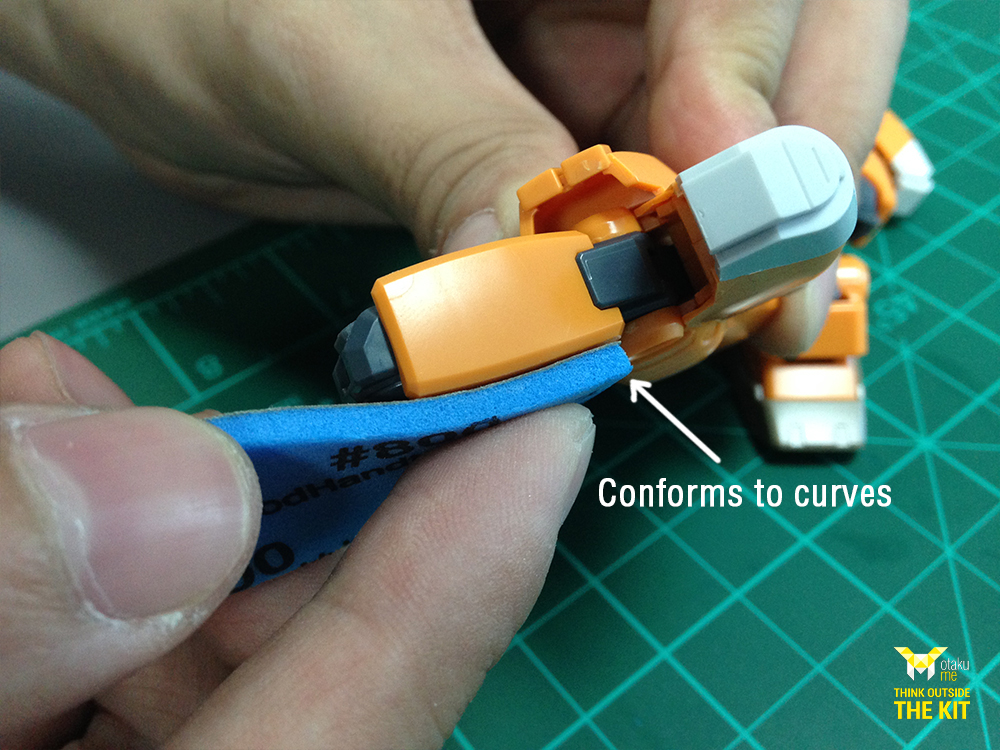
Step 3: Manual work and Clean up
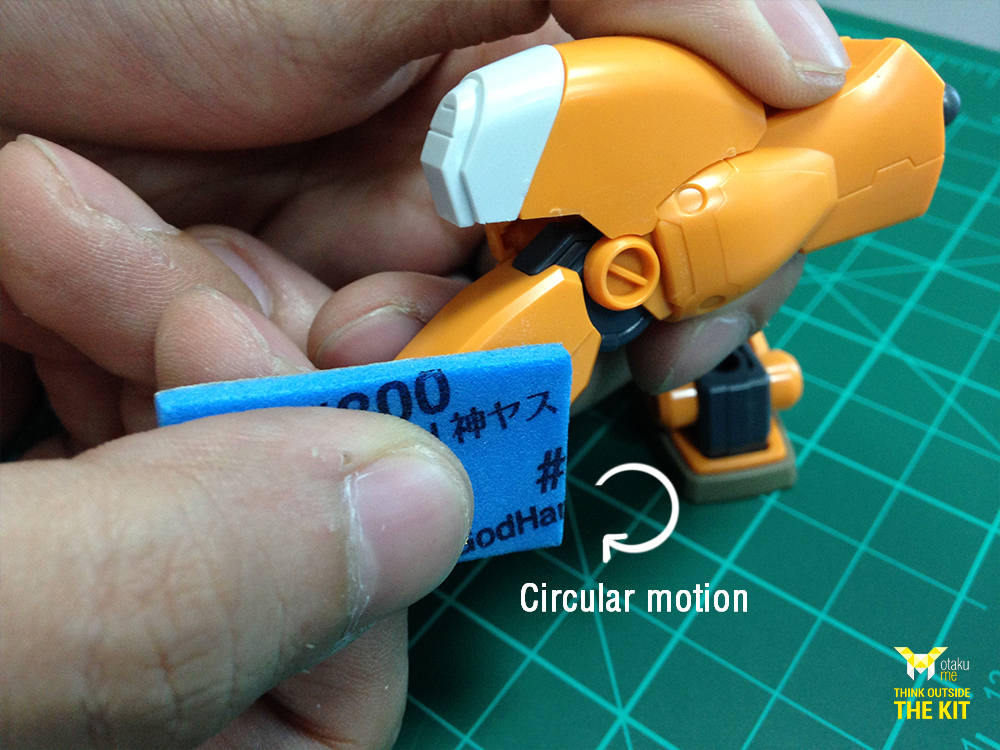
Go about rubbing away at the piece in a circular motion, applying light pressure. This ensures that you don't get too many scratch lines on the plastic and evens out the surface.
Let the sponge and the abrasive do its work on your kit
Finishing up...
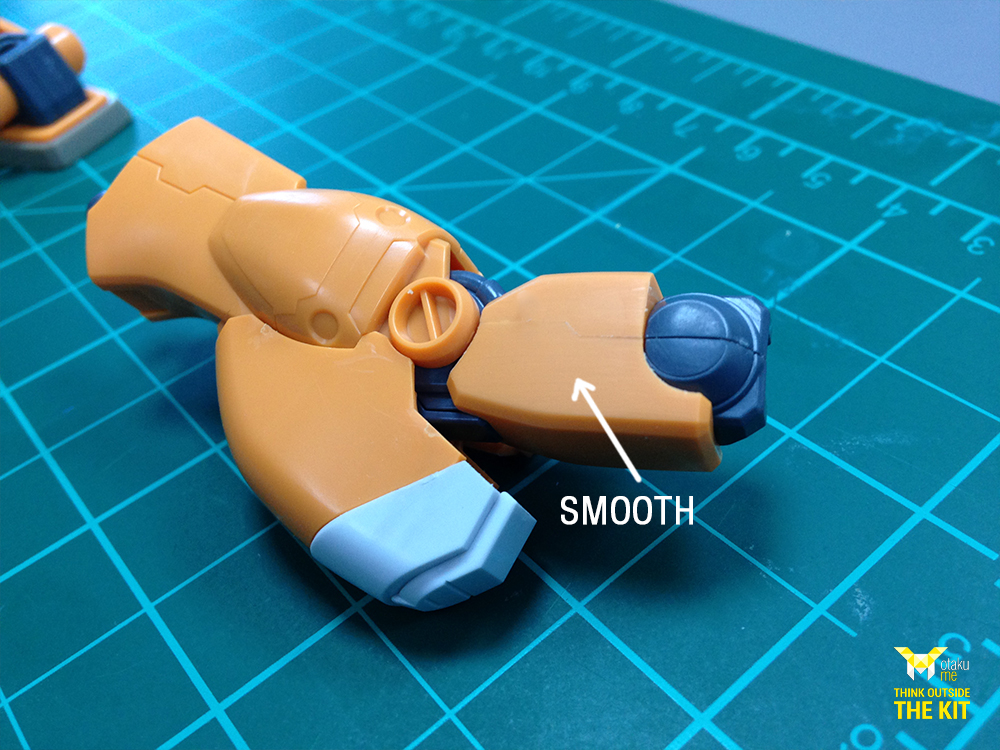
Brush or rub away any plastic dust and behold, No more nub marks on your awesome Gundam model :D