Gunpla Tip: Using BMC Dammo


- September 2022
- July 2022
- June 2022
- April 2022
- October 2021
- August 2021
- July 2021
- June 2021
- May 2021
- April 2021
- March 2021
- February 2021
- January 2021
- December 2020
- November 2020
- October 2020
- September 2020
- July 2020
- June 2020
- May 2020
- March 2020
- February 2020
- January 2020
- December 2019
- November 2019
- October 2019
- September 2019
- August 2019
- July 2019
- June 2019
- May 2019
- April 2019
- March 2019
- February 2019
- January 2019
- December 2018
- November 2018
- October 2018
- September 2018
- August 2018
- July 2018
- June 2018
- May 2018
- April 2018
- March 2018
- February 2018
- January 2018
- December 2017
- October 2017
- September 2017
- August 2017
- July 2017
- June 2017
- May 2017
- April 2017
- March 2017
- February 2017
- January 2017
- December 2016
- November 2016
- October 2016
- September 2016
- August 2016
- July 2016
- June 2016
- May 2016
- April 2016
- November 2015
- October 2015
- September 2015
- August 2015
- July 2015
- June 2015
- May 2015
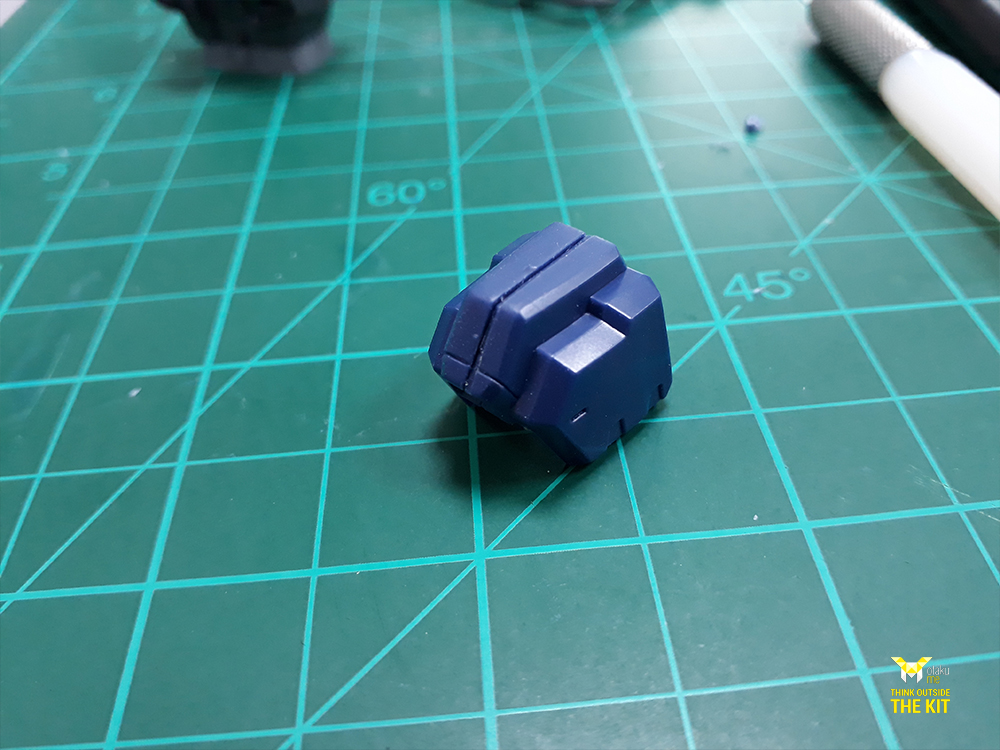
One of the key defining aspects of an awesome Gundam model kit is the amount of detail that it has
Most often older kits lack a few surface features and instead are almost littered with seam lines throughout the body where the parts connect together.
We'll show you a quick and easy process to fix and improve the overall outlook of your kits.
Overview:
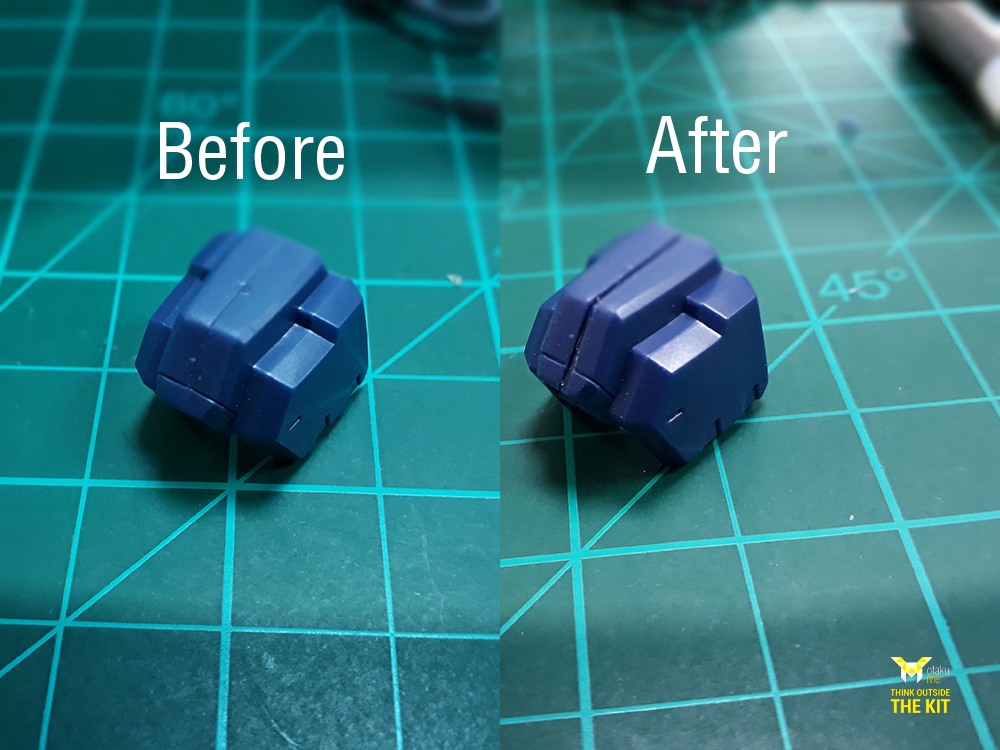
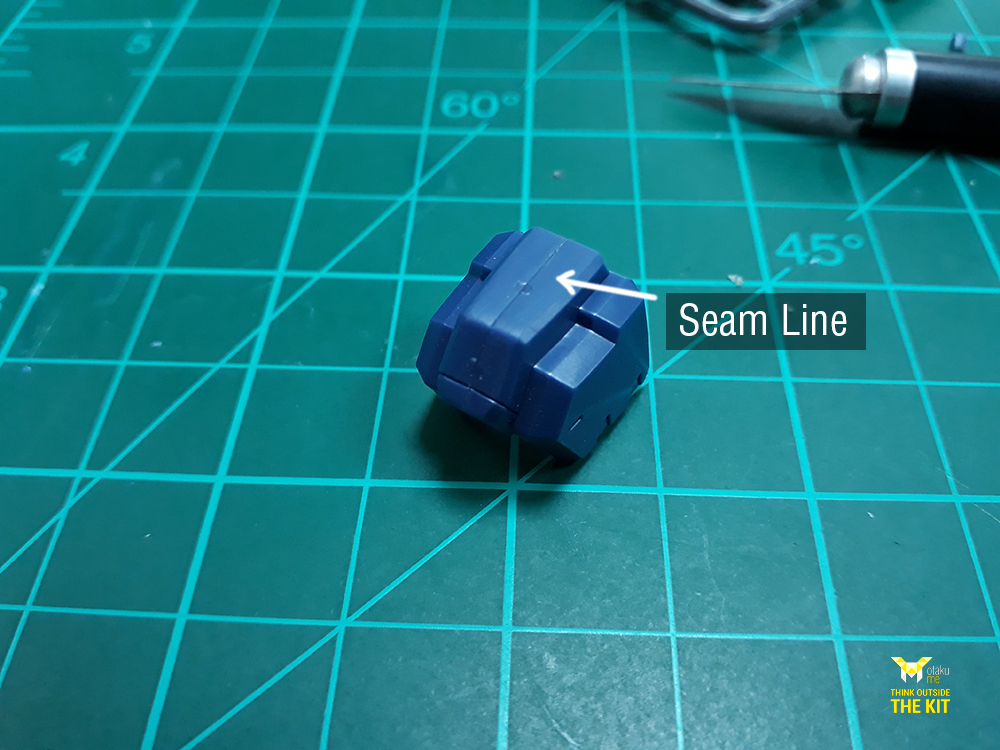
This is what a Seam line looks like. While somewhat minuscule, it shows that the model is actually toy-like. When adding details, it is important to think about how a model is suppose to represent something real, or in this case, mechanical since it is a Gundam.
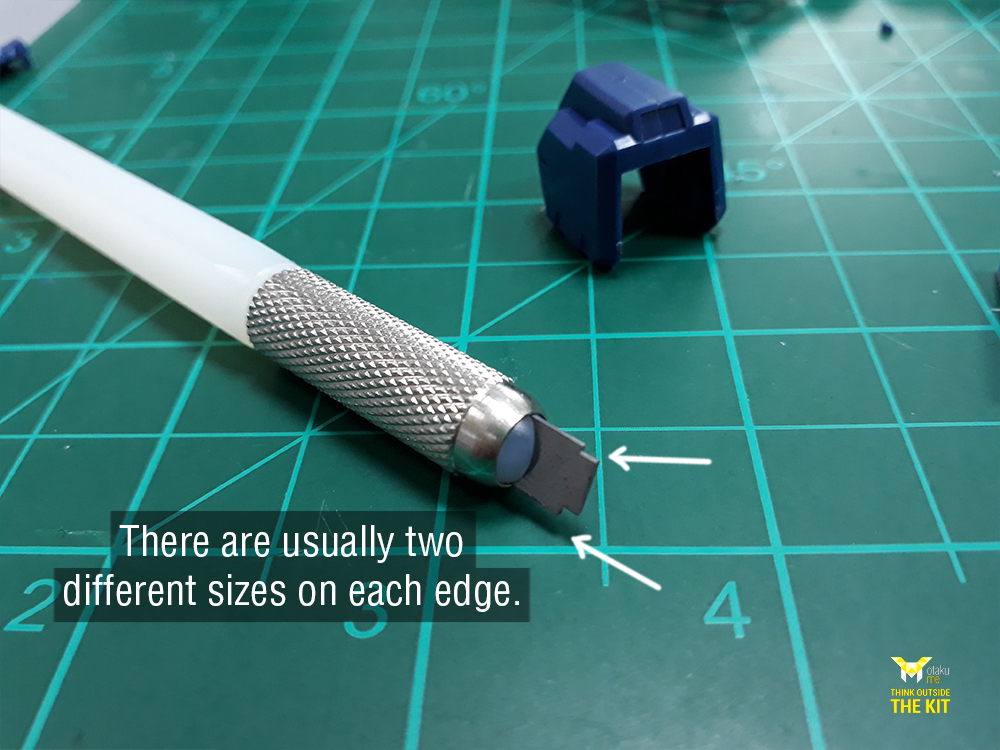
The Tool:
Using a simple tool, the BMC Dammo, it's easy to add details by converting an unsightly seam line into a neat panel line.
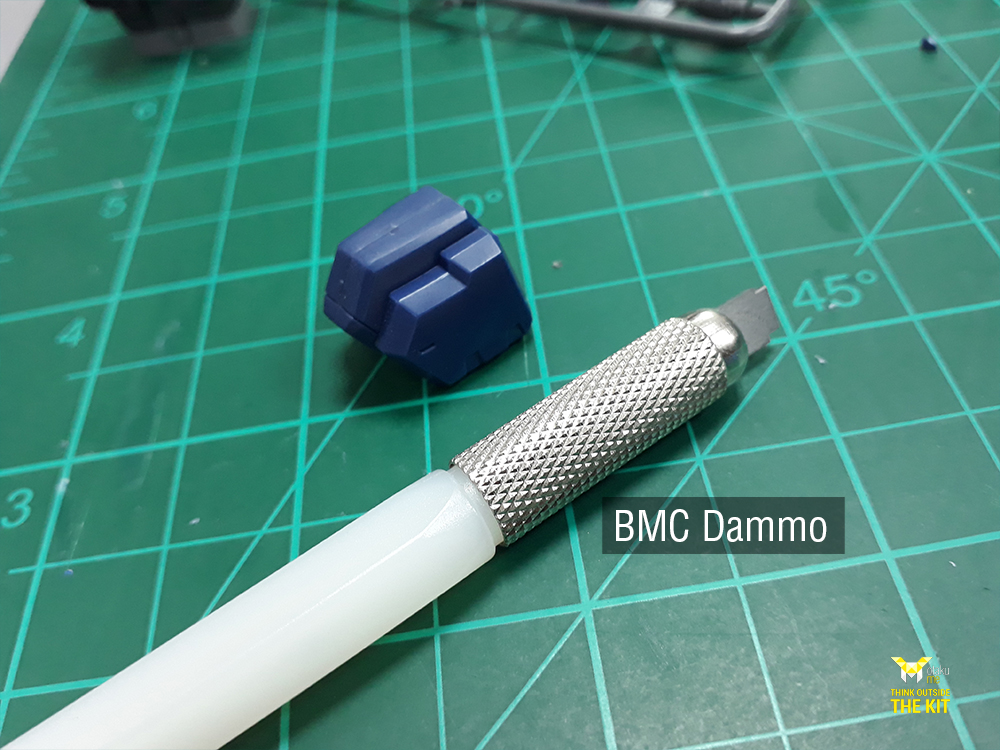
This one's got a 0.5mm and 0.8mm edge.
The Process:
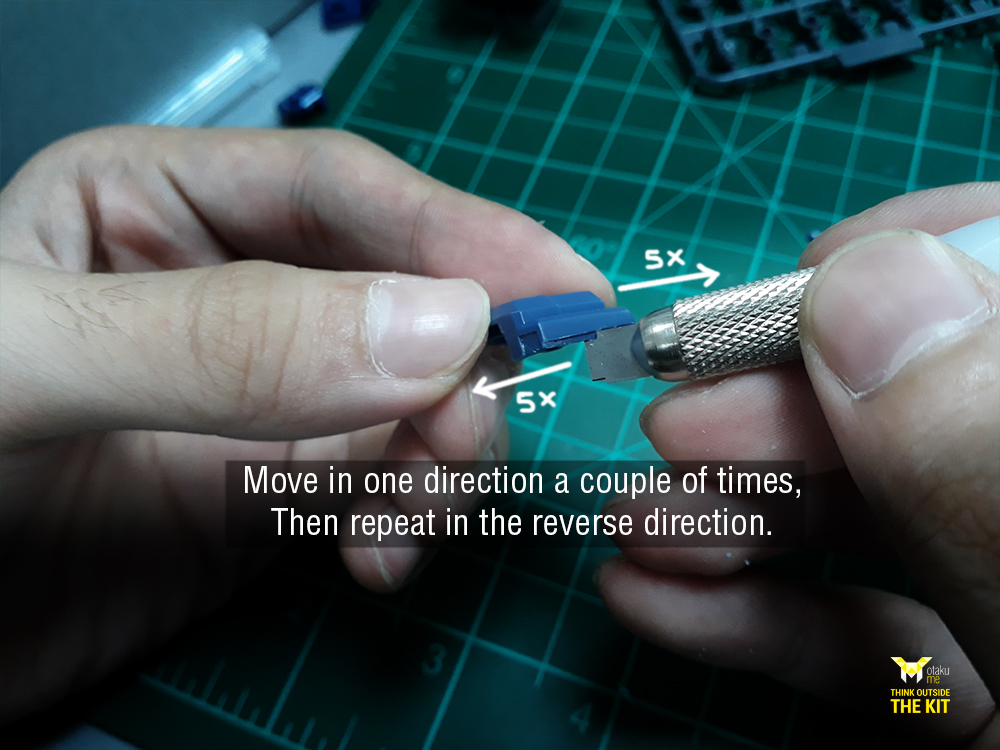
You'll want to use the edge most appropriate to your model's scale. We're using the 0.5mm edge here since this is a small 1/144 scale High Grade Gundam kit. Larger scales like 1/100 Master Grades will require larger edge sizes.
Remember to be consistent, keep a steady hand and do not use excess force. Let the tool do the work.
In no time at all, we've simultaneously removed the seamline and enhanced the detail! ^_^